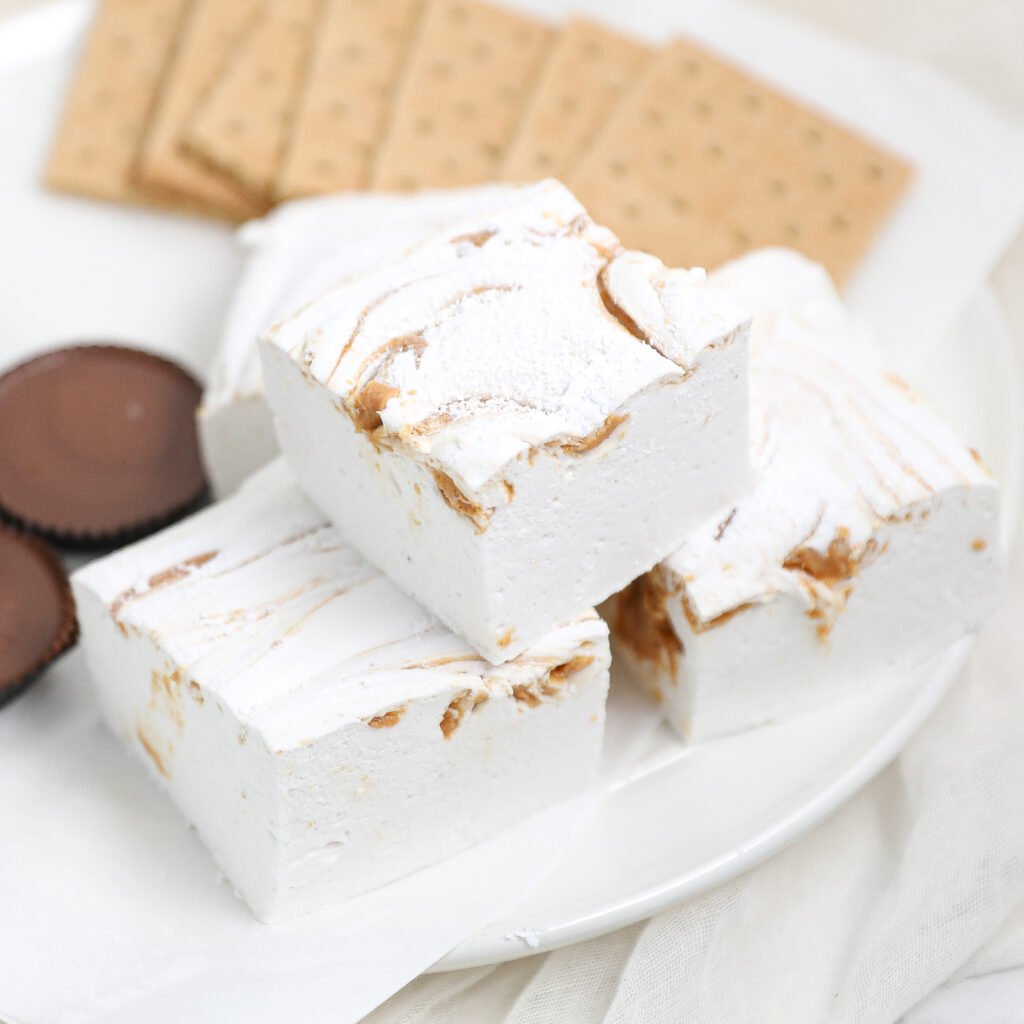
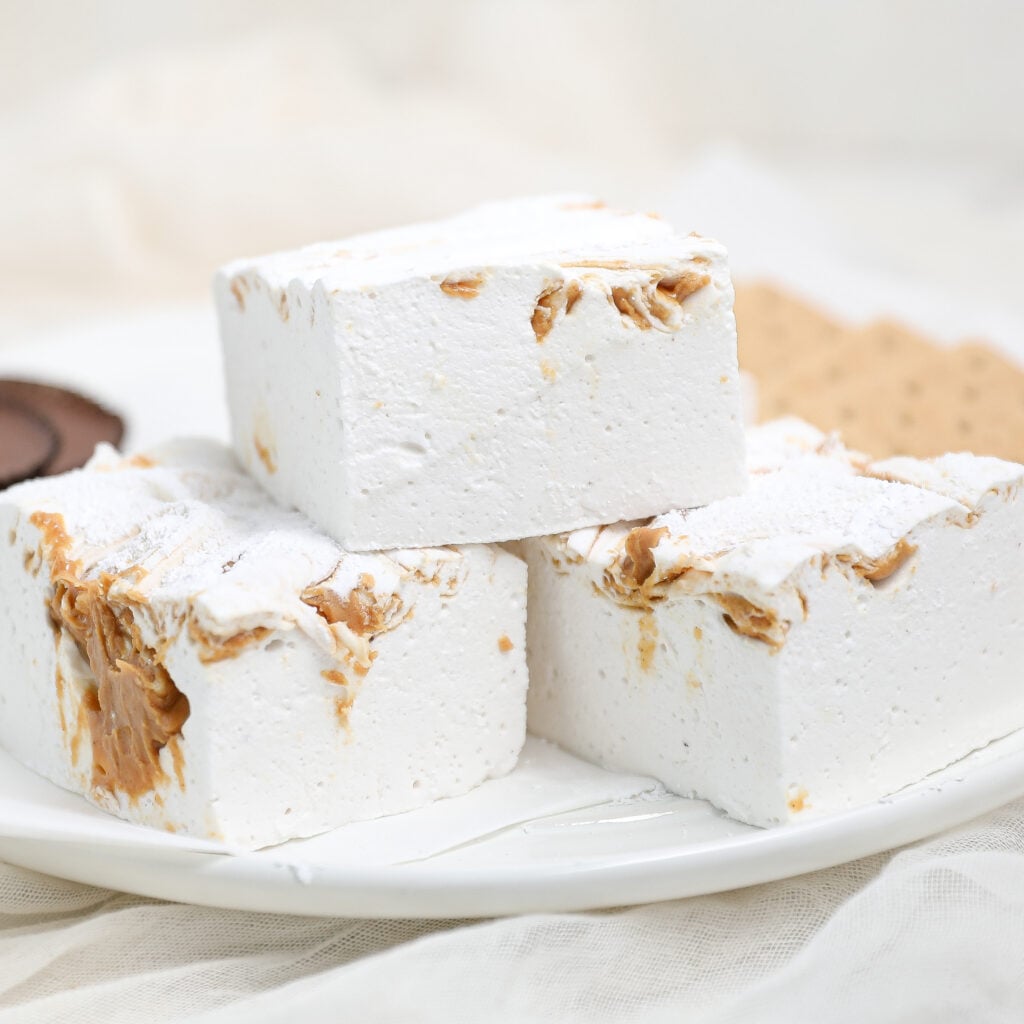
Fluffernutter Marshmallows (20-Minute Prep!)
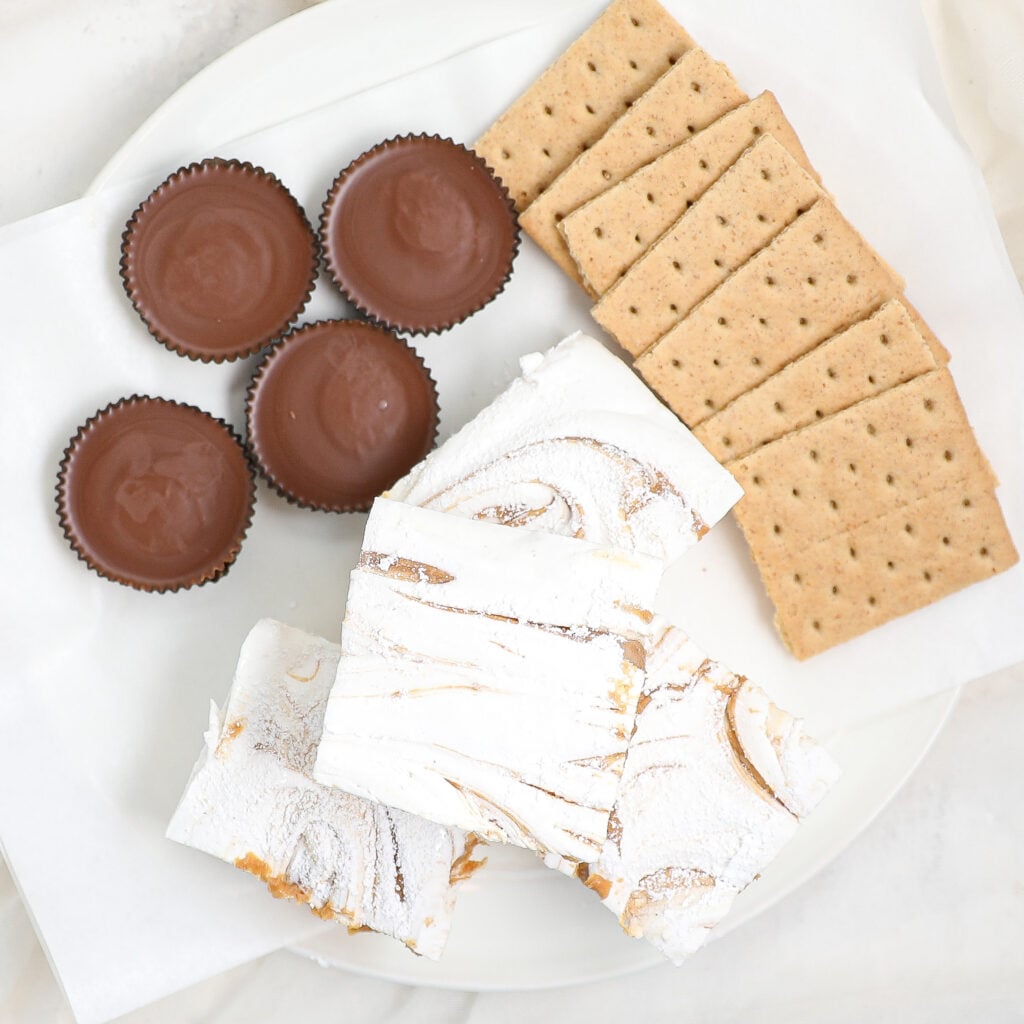
If you grew up eating fluffernutter sandwiches on squishy white bread, these homemade Fluffernutter Marshmallows are about to hit you right in the nostalgia. They’ve got that classic peanut butter and marshmallow combo but turned into soft, cloud-like squares you can actually make at home. The process is easier than you’d think: whip up a sugar syrup, blend it with gelatin, swirl in peanut butter, and let them set. They take about 20 minutes of active time and a few hours to rest, but the payoff is huge. Use them in s’mores, drop one in hot cocoa, or just eat them straight from the pan like no one’s watching. These are sweet, fluffy, and just salty enough to balance everything out.
As an Amazon Associate I earn from qualifying purchases.
Why You’ll Love Fluffernutter Marshmallows
- Nostalgic Flavor Hit: Combines the iconic fluffernutter sandwich flavors into a soft, chewy treat.
- No Baking Required: These are stovetop and mixer-only, making them a great project without turning on the oven.
- Perfect Texture: Light, bouncy marshmallows with just the right swirl of creamy peanut butter.
- Great for Gifting: Wrap them up in wax paper or toss them in a tin for a fun homemade present.
- S’mores Upgrade: Toss one of these in place of a regular marshmallow and thank yourself later.
Ingredients Needed To Make Fluffernutter Marshmallows
Make sure you scroll down to the recipe card to see the full list of ingredients needed for this recipe.
- Water
- Unflavored gelatin
- Vanilla bean paste or vanilla extract
- Kosher salt
- Corn syrup
- Granulated sugar
- Creamy peanut butter
- Cornstarch
- Powdered sugar
How To Make Fluffernutter Marshmallows
- Grease a square pan so the marshmallows don’t stick.
- Sprinkle gelatin into water in a mixing bowl and let it sit.
- Heat the rest of the water with sugar, salt, and corn syrup until it reaches the right temperature.
- Let the syrup cool briefly, then slowly mix it into the gelatin and whip until thick and fluffy.
- Stir in the vanilla, then quickly spread the mixture into the prepared pan.
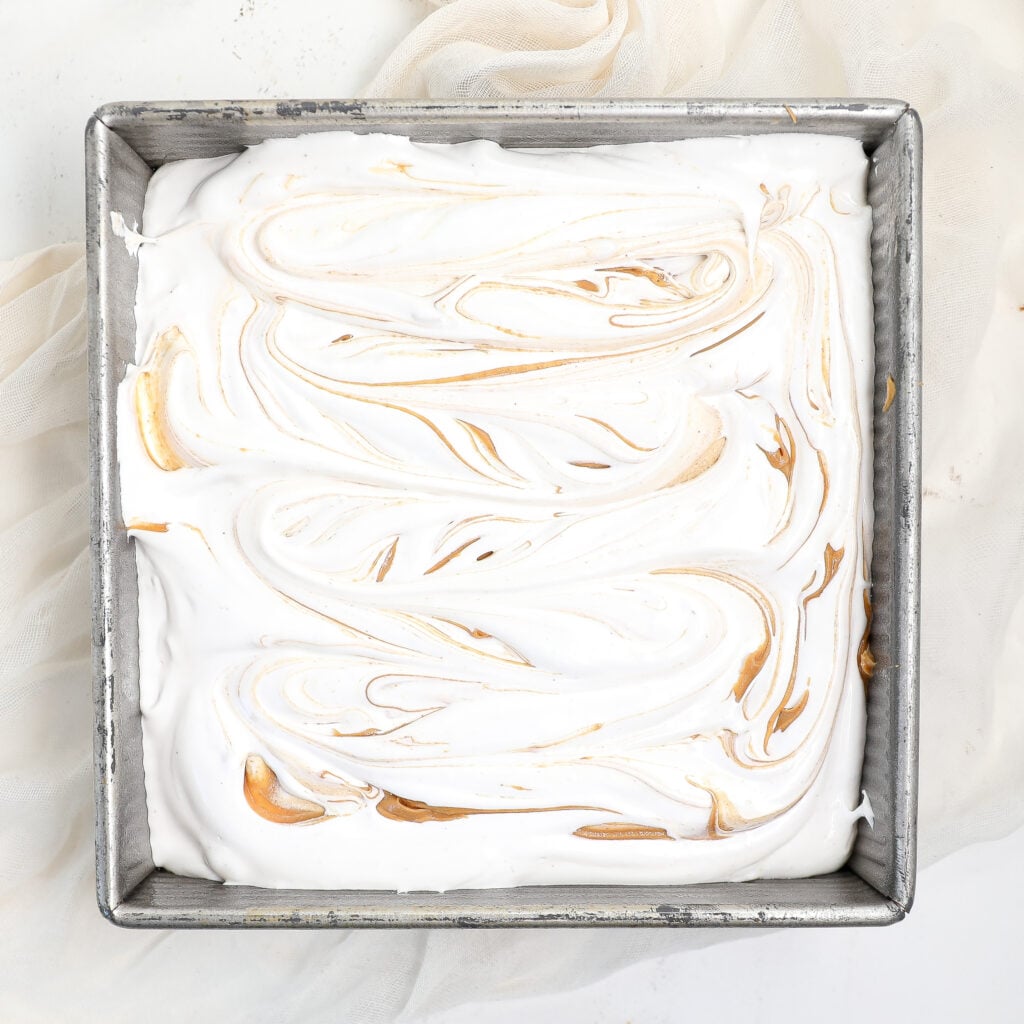
- Add spoonfuls of peanut butter on top and swirl it through before the marshmallows start to set.
- Let them rest at room temperature for a few hours to firm up.
- Dust with a powdered sugar and cornstarch mix, then slice into squares and enjoy.
Troubleshooting Tips
- Marshmallows too sticky? Make sure to dust generously with the cornstarch–powdered sugar mix and use a greased knife.
- Didn’t set? This usually happens if the syrup didn’t reach 240°F. Be precise with a candy thermometer.
- Texture too soft or too stiff? Under-whipping leads to soft texture; over-whipping may cause clumping. Beat until stiff peaks just form.
- Peanut butter sinking or clumping? Dollop gently and swirl right away before the marshmallow begins to set.
Commonly Asked Questions
Why didn’t my marshmallows set properly?
If your marshmallows didn’t firm up, chances are the sugar syrup didn’t reach the correct temperature. Use a reliable candy thermometer and make sure it hits 240°F before removing it from the heat.
How do I keep the marshmallows from sticking when I cut them?
Dust your work surface and knife with a mixture of powdered sugar and cornstarch. A greased pizza cutter or sharp knife also helps you get clean slices without the mess.
When should I swirl in the peanut butter?
As soon as you pour the marshmallow mixture into the pan. Dollop the peanut butter right on top and swirl immediately before it starts to set for the best texture and visual effect.
Can I use natural peanut butter?
Stick to creamy, no-stir peanut butter for best results. Natural peanut butter tends to separate and won’t swirl as well into the marshmallow base.
How long do homemade marshmallows last?
Store them in an airtight container at room temperature for up to one week. No need to refrigerate. Just keep them away from heat and moisture.
Can I freeze these marshmallows?
Freezing is not recommended since the texture can become dense or sticky after thawing. They’re best enjoyed fresh within several days.
Do I need a stand mixer for this recipe?
A stand mixer works best because you’ll need to whip the mixture on high for several minutes. A hand mixer can work in a pinch, but you’ll need to hold it steady the whole time.

Fluffernutter Marshmallows
Video
Ingredients
Marshmallows
- 1 cup water divided
- 2 packets unflavored gelatin 0.25 oz each
- 1 ½ tsp vanilla bean paste or vanilla extract
- Pinch of kosher salt
- 1 cup corn syrup
- 1 ½ cups granulated sugar
- ½ cup creamy peanut butter
Powdered Sugar Dusting
- 2 tbsp cornstarch
- ½ cup powdered sugar
Instructions
- Prepare Pan: Grease an 8×8 or 9×9 pan with butter. An 8×8 will give you thicker marshmallows.
- Bloom Gelatin: Add ½ cup of the water to the bowl of a stand mixer. Sprinkle in the gelatin. Set aside.
- Make Sugar Syrup: In a medium saucepan, combine the remaining ½ cup of water with the salt, corn syrup, and granulated sugar. Without stirring, heat over medium heat until it reaches 240°F using a candy thermometer.
- Cool Slightly: Remove from heat and let it cool for 5 minutes.
- Whip: Turn the mixer on low, and slowly pour the syrup into the gelatin. Gradually increase speed to high and beat until thick and fluffy (about 7–10 minutes). Add vanilla paste once it begins to thicken.
- Pour & Swirl: Spray a spatula with nonstick spray and quickly pour marshmallow mixture into the prepared pan. Dollop peanut butter on top and swirl with a knife.
- Set: Let the marshmallows sit at room temperature for at least 4 hours.
- Dust & Cut: Mix the powdered sugar and cornstarch. Dust the top of the marshmallows and your work surface. Turn out the slab, dust the other side, slice into squares, and enjoy!
Notes
Troubleshooting Tips
-
- Marshmallows too sticky? Make sure to dust generously with the cornstarch–powdered sugar mix and use a greased knife.
-
- Didn’t set? This usually happens if the syrup didn’t reach 240°F. Be precise with a candy thermometer.
-
- Texture too soft or too stiff? Under-whipping leads to soft texture; over-whipping may cause clumping. Beat until stiff peaks just form.
-
- Peanut butter sinking or clumping? Dollop gently and swirl right away before the marshmallow begins to set.
Nutrition
These fluffernutter marshmallows are one of those things you don’t realize you needed until you try them. They’re soft, sweet, and just the right amount of peanut buttery. I’ve made them for s’mores, dropped them in hot chocolate, and yes, eaten them straight out of the pan. Once you see how easy they are, you’ll be looking for excuses to make another batch.