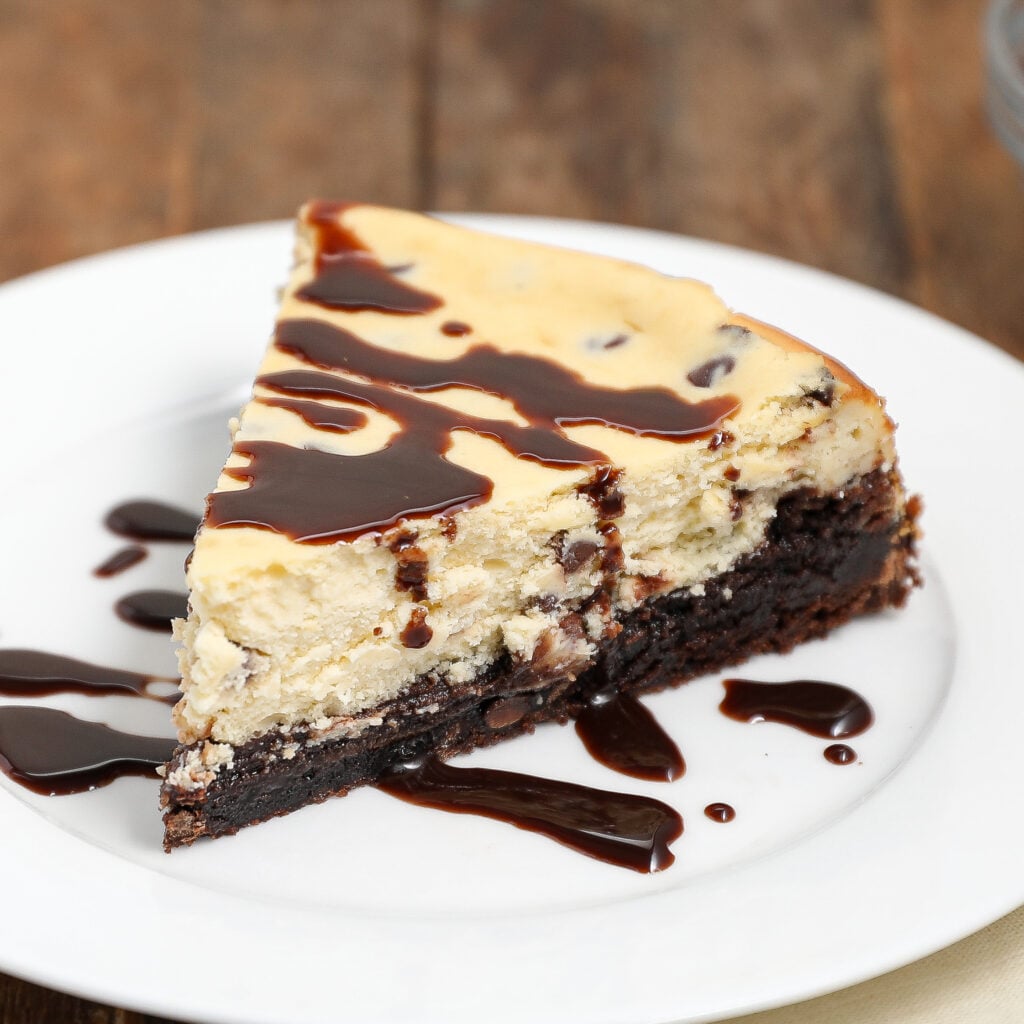
Rich Brownie Cheesecake
During the holidays, one of my favorite things is sharing homemade treats with friends and family. This brownie cheesecake is hands-down one of my go-to desserts for those get-togethers. It’s so simple to make, and honestly, I love how the rich brownie base pairs with that creamy cheesecake layer—it’s the perfect combination! What makes this even better is that it’s super easy, thanks to Krusteaz’s Gluten Free Double Chocolate Brownie Mix. I always keep a box of this brownie mix in my pantry for quick and delicious desserts, and the best part? No one will ever guess it’s gluten-free! With Krusteaz, baking during the busy holiday season is fun and effortless.
As an Amazon Associate I earn from qualifying purchases.
Why You’ll Love This Rich Brownie Cheesecake Recipe
- Perfect for Any Occasion: Whether you’re hosting a holiday gathering or just craving a treat, this brownie cheesecake is a crowd-pleaser. It’s indulgent, yet easy enough to make on a whim.
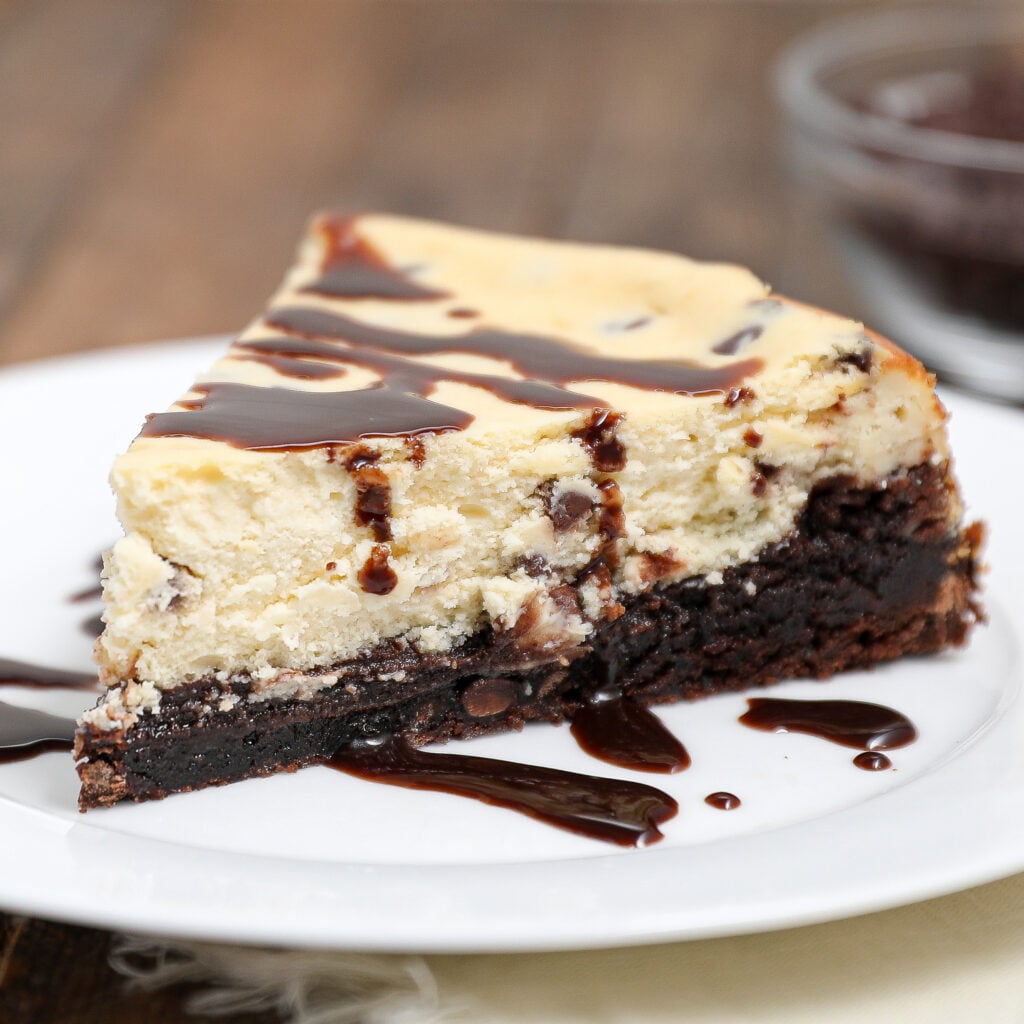
- Rich and Decadent Layers: The combination of a fudgy brownie base and a creamy cheesecake topping is a match made in dessert heaven. It’s the best of both worlds in every bite!
- Super Easy to Make: Thanks to Krusteaz Gluten Free Double Chocolate Brownie Mix, you can skip the complicated steps and still end up with a rich, melt-in-your-mouth dessert. Just mix, bake, and enjoy!
- Chilled to Perfection: The cheesecake layer needs to chill for a few hours, which means it’s perfect for prepping ahead of time. You can make it the night before, leaving you stress-free the day of your event.
- Great for Sharing: This dessert is the perfect size to slice and share with friends and family, making it ideal for get-togethers. Plus, with the brownie base, it has a little something for everyone!
Ingredients Needed To Make This Rich Brownie Cheesecake Recipe
Make sure you scroll down to the recipe card to see the full list of ingredients needed for this recipe.
- Krusteaz Gluten Free Double Chocolate Brownie Mix
- Water
- Egg
- Vegetable oil
- Cream cheese
- Sour cream
- Eggs
- Vanilla extract
- Sugar
- Mini chocolate chips
- Chocolate drizzle (optional)
Oven Temperatures
Oven temperatures can vary significantly from one oven to another. To achieve consistent results, it’s crucial to know the exact temperature inside your oven. The safest and most accurate way to determine this is by using an oven thermometer. This simple tool can help you avoid underbaking or overbaking your treats.


How To Make This Rich Brownie Cheesecake Recipe
- Prepare the Brownie Base: Start by mixing the brownie ingredients together and pour the batter into the prepared pan. Bake it for a short time until set.

- Make the Cheesecake Layer: Combine the cheesecake ingredients and beat until smooth. Add chocolate chips and mix well.
- Assemble the Layers: Pour the cheesecake mixture over the baked brownie base and return to the oven to bake for the remaining time.

- Cool and Chill: Let the cheesecake cool to room temperature, then refrigerate for several hours to let it set properly.
- Serve: Once chilled, remove the cheesecake from the pan, drizzle with chocolate, slice, and enjoy!
Commonly Asked Questions
How do I store leftover Brownie Cheesecake?
To store your leftover brownie cheesecake, simply cover it tightly with plastic wrap or transfer it into an airtight container. It will keep in the fridge for up to 3-4 days. Just make sure it stays chilled until you’re ready to enjoy another slice!
Can I freeze this brownie cheesecake?
Yes, you can freeze the brownie cheesecake! After it’s fully set and chilled, wrap it tightly in plastic wrap and then foil to prevent freezer burn. You can store it for up to 2-3 months. To thaw, place it in the fridge overnight before serving.
What can I substitute for mini chocolate chips in the cheesecake layer?
If you don’t have mini chocolate chips, regular chocolate chips or even chopped chocolate will work just fine. You can also get creative and use other types of chips like peanut butter or butterscotch for a fun twist.
Can I make this brownie cheesecake in advance?
Absolutely! In fact, making this dessert ahead of time works perfectly since it needs to chill for several hours. You can make it a day or two before your event and let it set in the fridge, ensuring it’s ready when you need it.
How do I know when the cheesecake is done baking?
The cheesecake layer is done when it’s slightly set around the edges but still a little wobbly in the center. After baking, let it cool completely at room temperature before chilling to allow it to fully set and firm up.
Why does the cheesecake need to chill for 6 hours?
The cheesecake layer needs time to firm up and set properly, which is why the 6-hour chilling period is essential. This ensures you get that perfect creamy texture without any wobbling when slicing. Plus, it’s totally worth the wait!

Brownie Cheesecake
Equipment
- nonstick baking spray
Ingredients
For the Brownie Layer:
For the Cheesecake Layer:
- 16 ounces cream cheese room temperature
- ½ cup sour cream
- 2 eggs
- 2 tsp vanilla extract
- ½ cup sugar
- ½ cup mini chocolate chips
Optional Topping:
- Chocolate drizzle
Instructions
Brownie Layer
- Preheat oven to 350°F. Spray a 9” round springform pan with nonstick baking spray and place it on a baking sheet.
- In a mixing bowl, combine brownie mix, water, egg, and vegetable oil. Mix until smooth.
- Pour the brownie batter into the prepared springform pan and bake for 10 minutes.
- While the brownie layer is baking, prepare the cheesecake layer.
Cheesecake Layer
- Reduce the oven temperature to 325°F.
- In a mixing bowl, add cream cheese, sour cream, eggs, vanilla extract, and sugar. Beat until smooth.
- Fold in mini chocolate chips.
- Pour the cheesecake mixture over the partially baked brownie layer.
- Return to the oven and bake for 45 minutes.
Cooling and Chilling
- Remove from the oven and let the cheesecake cool to room temperature.
- Refrigerate for at least 6 hours to allow it to fully set.
Serve
- Remove the cheesecake from the springform pan, drizzle with chocolate, slice, and enjoy!
Nutrition
This brownie cheesecake is my go-to dessert when I want something that’s indulgent, yet surprisingly simple to make. The rich, fudgy brownie base and creamy cheesecake layer come together perfectly for a treat that’s sure to wow your guests. Whether it’s a family get-together or just a sweet craving, this dessert is a crowd-pleaser every time! You’ll love how easy it is with Krusteaz—baking has never been this fun!