Dessert | Memorial Day | Pies | Summer
No-Bake Berry Lush Pie Recipe
As an Amazon Associate I earn from qualifying purchases.
Fresh, Creamy, And Made For Warm Days
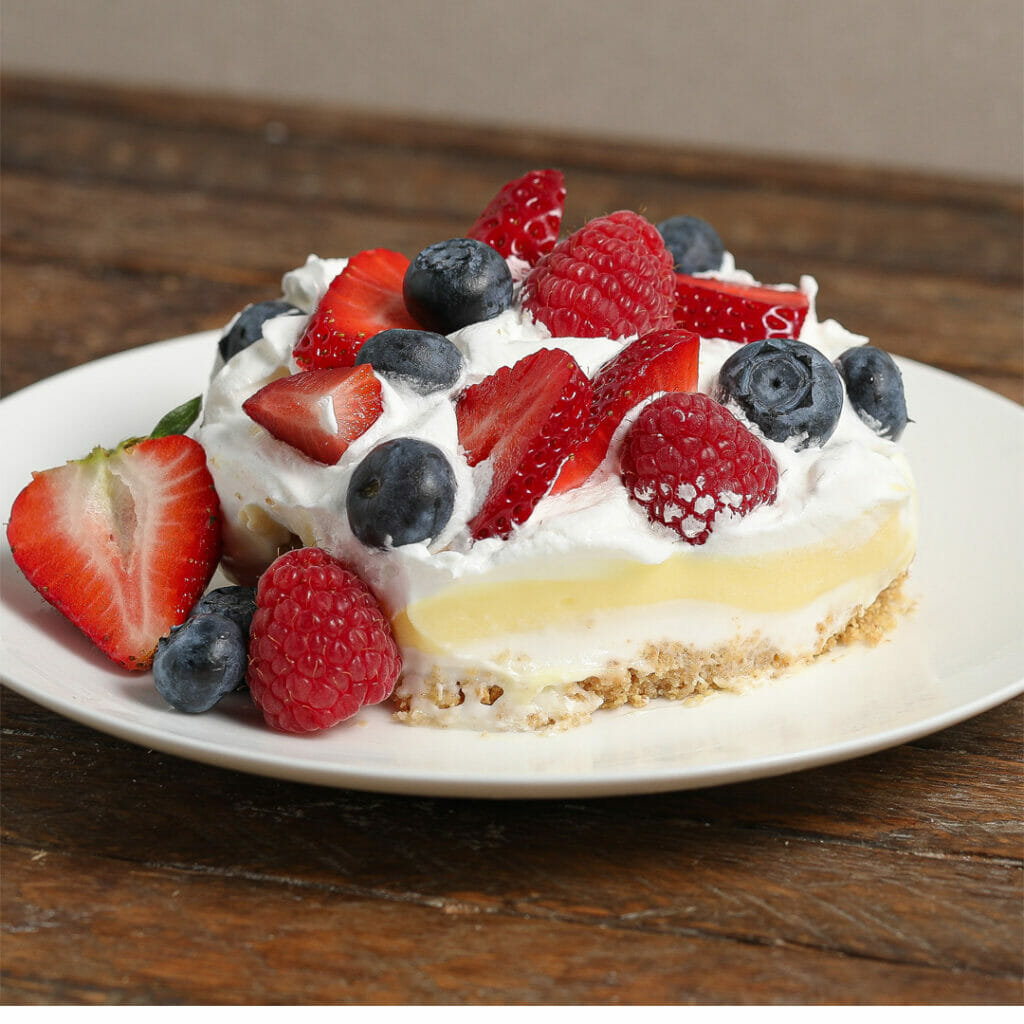
This dessert starts with a buttery cookie crust, then layers on a smooth cream cheese filling and soft coconut pudding for a cool, creamy slice. The whipped topping keeps the finish light, while the berries add fresh flavor and a pretty pop of color across the top.
The strawberries, raspberries, and blueberries add juicy texture and a little tartness, which breaks up the sweetness of the filling and makes the cold slices taste fresher!
Here is how it all comes together:

- Press the crushed cookie crumbs and melted butter into the dish to form an easy no-bake crust.
- Mix the cream cheese, powdered sugar, and vanilla until smooth, then spread the mixture over the crust.
- Whisk the coconut pudding and milk together until thick and creamy, then spread it over the cream cheese layer.
- Spread the whipped topping over the pudding for a soft, fluffy finish.
- Top the dessert with fresh berries.

After chilling, the layers set up into soft, neat slices that are easy to serve straight from the pan. You can scatter the berries casually or arrange them in a more polished pattern for parties and holiday tables!

- Cover the pie tightly with plastic wrap or store individual slices in an airtight container in the refrigerator for up to 4 days. The crust will soften slightly as it chills while the flavors continue to develop.
- To freeze, wrap the whole pie or individual slices tightly in plastic wrap followed by aluminum foil, or place them in freezer-safe containers. Freeze for up to 2 months and thaw overnight in the refrigerator before serving. For the best texture and appearance, add any fresh berry garnish after thawing.
- This is an excellent make-ahead dessert. Assemble the pie up to 24 hours in advance, cover, and refrigerate until ready to serve. Chilling overnight allows the layers to fully set, making the pie easier to slice and even more delicious.

No-Bake Berry Lush Pie
No-Bake Berry Lush Pie layers a buttery crust with sweet cream cheese, coconut pudding, whipped topping, and fresh berries for a cool, creamy dessert that is easy to make ahead!
Equipment
- 1 Mixer
Video

Ingredients
- 10.6 ounces graham ccrackrs
- 8 tbsp unsalted butter, melted
- 5.1 ounces instant coconut pudding
- 2 ½ cups milk
- 16 ounces cream cheese (room temperature)
- 2 cups powdered sugar
- 2 tsp vanilla extract
- 8 ounces whipped topping
- 1 lbs fresh strawberries, sliced
- 6 ounces fresh raspberries
- 6 ounces fresh blueberries
Instructions
- Finely crush the graham crackers. Spread them in a 9×13 baking dish.
- Pour the melted butter over the top of the graham crackers and mix. Lightly press down to form the crust. You can use the bottom of a measuring cup for this.
- Add the cream cheese, powdered sugar, and vanilla to a bowl and mix until smooth and creamy. Spread over the top of the crust.
- Add the pudding and milk to a bowl and mix until smooth and set. If using dairy free milk use a hand mixer on high to help it set. Spread over the cream cheese later.
- Spread the whipped topping over the pudding.
- Arrange the berries on top.
- Allow the pie to refrigerate for at least 2 hours.
- Slice and enjoy!
Notes
- For the cleanest slices, refrigerate the pie for at least 6 hours, or overnight for the best texture.
- Make sure the cream cheese is fully softened before mixing to create a smooth, lump-free filling.
- Allow any cooked berry filling to cool completely before assembling so the creamy layers stay light and fluffy.
- Spread each layer gently using an offset spatula or the back of a spoon to create even layers.
- If using frozen berries, thaw and drain any excess liquid before adding them to the filling to prevent the pie from becoming watery.
- Garnish with fresh berries just before serving for the freshest flavor and presentation.
Nutrition
Calories: 761kcalCarbohydrates: 101gProtein: 12gFat: 38gSaturated Fat: 23gPolyunsaturated Fat: 2gMonounsaturated Fat: 9gTrans Fat: 0.5gCholesterol: 97mgSodium: 637mgPotassium: 562mgFiber: 10gSugar: 69gVitamin A: 2220IUVitamin C: 41mgCalcium: 206mgIron: 11mg
Tried this recipe?Mention @TheSaltyCooker or tag #thesaltycooker!