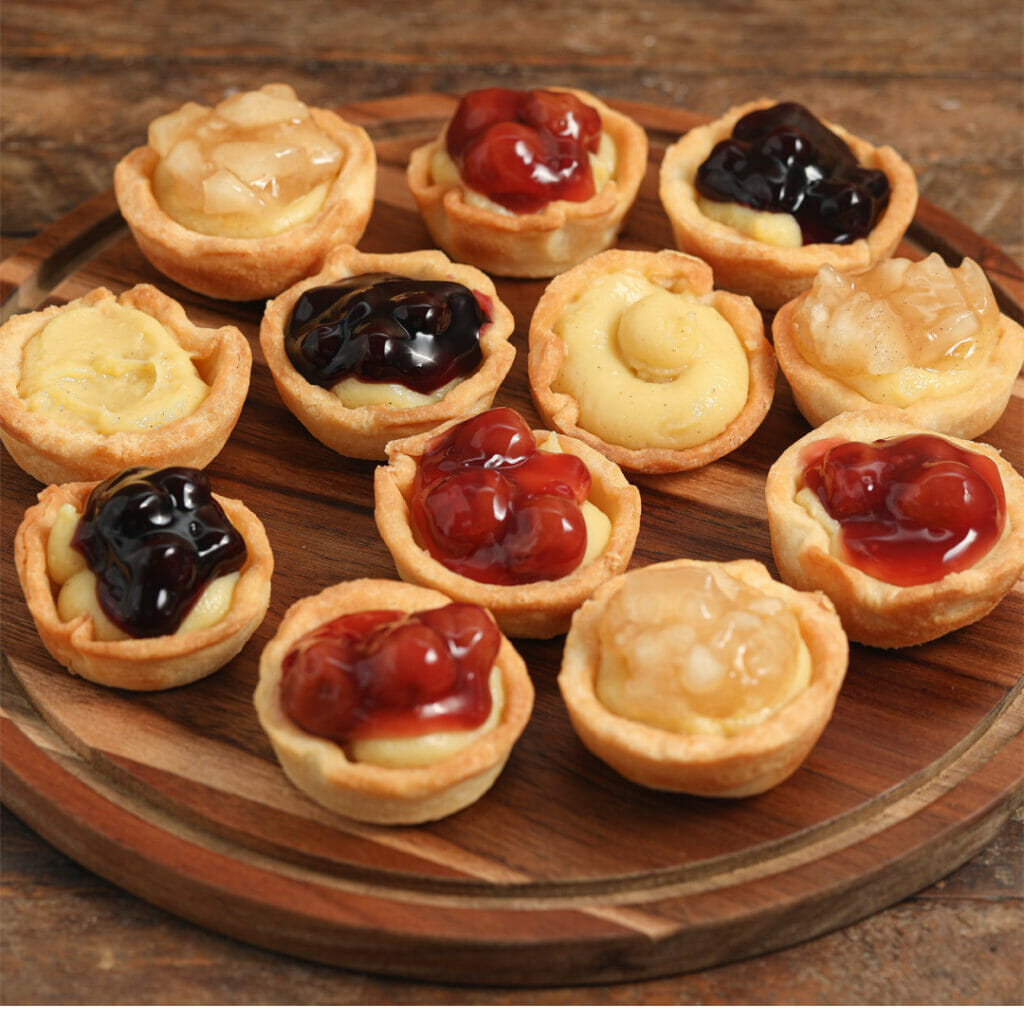
Easy Mini Fruit Pie Tarts with Homemade Pastry Cream
Easy Mini Fruit Pie Tarts are one of those desserts that always look like they took far more work than they actually did. A buttery homemade pastry shell is filled with silky vanilla pastry cream before being topped with your favorite fruit filling for a dessert that’s equal parts elegant and irresistible. Whether you’re hosting a baby shower, celebrating the holidays, planning a brunch, or bringing dessert to a summer cookout, these bite-sized fruit tarts are guaranteed to steal the show.
As an Amazon Associate I earn from qualifying purchases.
Why I Make These Again and Again
I’ve always had a weakness for tiny desserts. Maybe it’s because they’re almost too pretty to eat, or maybe it’s because I can convince myself that grabbing a second one somehow doesn’t count. Either way, these little fruit pie tarts have become one of my favorite desserts to make when people are coming over.
I started making them for holidays because I wanted something that looked special without spending all day in the kitchen. The homemade pastry cream makes them feel a little fancy, while the fruit topping keeps them bright, colorful, and easy to customize for just about any occasion.

They’re one of those desserts people can’t help but reach for. Before long, everyone is asking what flavor they’re grabbing next, and the dessert tray is empty before the meal is even over. Those are always my favorite recipes to share.

Why You’ll Love These Mini Fruit Pie Tarts
- They’re perfect for entertaining. Their individual size makes serving easy for parties, holidays, baby showers, and brunches.
- They can be made ahead. Bake the tart shells and prepare the pastry cream in advance, then assemble everything before serving.
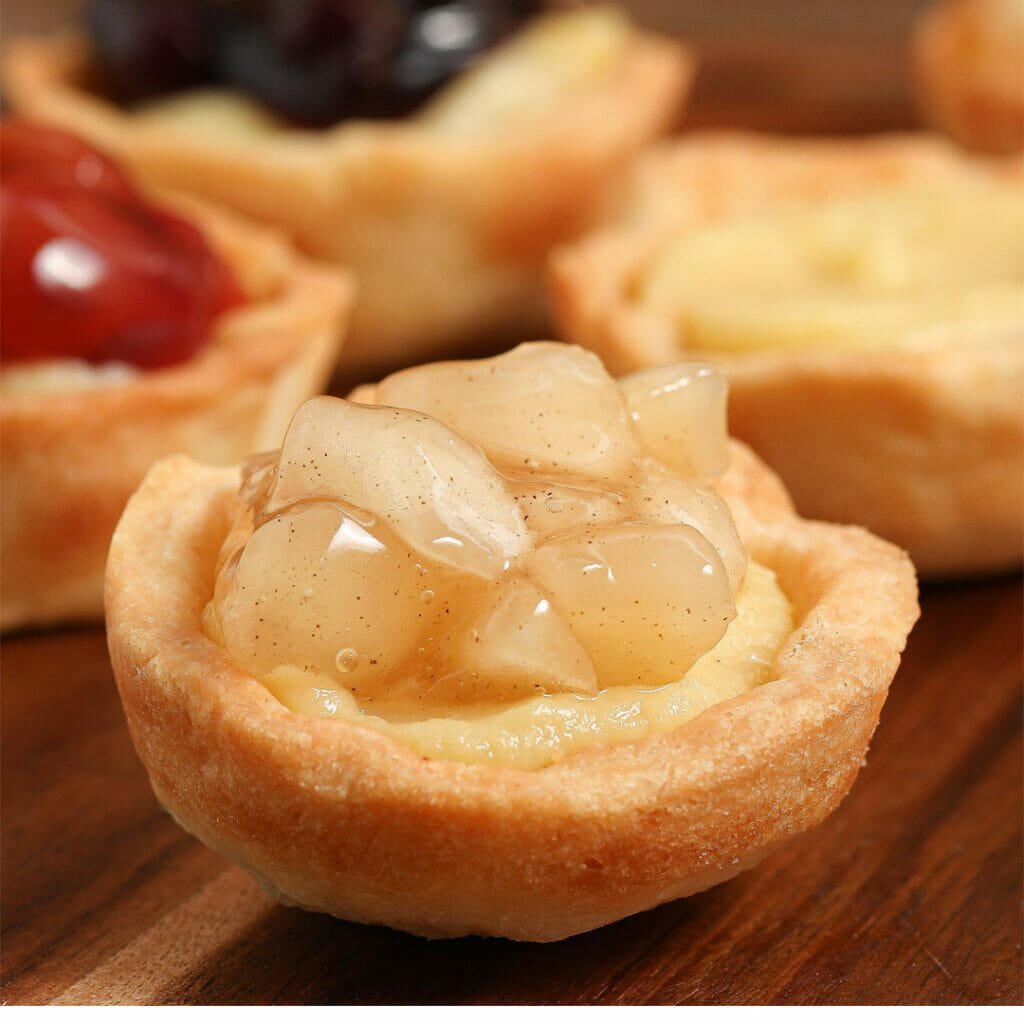
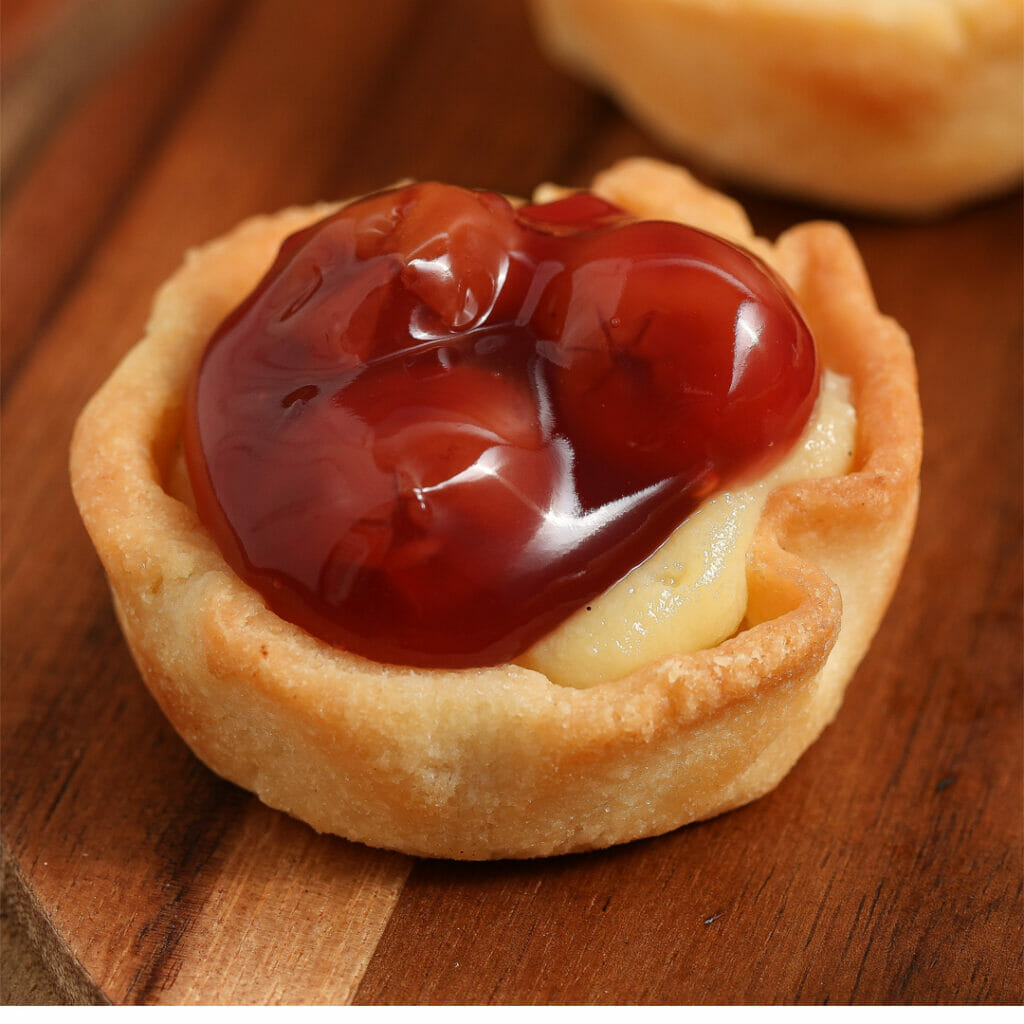
- They’re easy to customize. Use blueberry, cherry, strawberry, raspberry, peach, or your favorite pie filling to create a variety of flavors.
- Every bite has the perfect balance. The flaky pastry, creamy vanilla filling, and sweet fruit topping create a dessert that’s light, rich, and refreshing all at once.
- They look like they came from a bakery. These homemade mini fruit tarts are beautiful enough for special occasions but simple enough for any weekend.
Ingredients You’ll Need
- All-Purpose Flour – Creates a buttery, tender pastry crust that’s sturdy enough to hold the creamy vanilla filling while staying light and flaky.
- Cold Butter – Cold butter creates flaky layers throughout the crust, giving these homemade mini fruit pie tarts their classic texture.
- Kosher Salt – A small amount of salt balances the sweetness and enhances the rich buttery flavor of the pastry.
- Ice Water – Ice-cold water helps bring the dough together while keeping the butter cold for the flakiest tart shells.
- Whole Milk – Whole milk creates a rich, smooth vanilla pastry cream that’s perfect for filling homemade fruit tarts.
- Egg Yolks – Egg yolks give the pastry cream its silky texture, beautiful color, and rich flavor.
- Whole Egg – Adds structure while keeping the pastry cream smooth and creamy.
- Granulated Sugar – Sweetens the pastry cream without overpowering the fresh vanilla flavor.
- Vanilla Bean Paste or Vanilla Bean – Adds deep vanilla flavor that pairs beautifully with both the pastry cream and fruit topping.
- Cornstarch – Thickens the pastry cream so it pipes beautifully into each tart shell.
- Fruit Pie Filling – Blueberry, cherry, strawberry, apple, or your favorite fruit pie filling makes these mini fruit pie tarts colorful, delicious, and easy to customize for every season.
How to Make Easy Mini Fruit Pie Tarts
- Make the Pastry Dough
- Start by combining the flour, cold butter, kosher salt, and ice water in a food processor or blender. Pulse everything together just until the dough begins to form. You still want to see small pieces of butter throughout the dough because those little pockets create the flaky texture once baked.
- Transfer the dough to plastic wrap, shape it into a disk, and refrigerate it for about 20 minutes. Chilling the dough makes it much easier to roll while also helping the crust hold its shape during baking.
- Roll the chilled dough to about ⅛-inch thick before cutting circles with a 4-inch round cutter. Gently press each circle into a standard muffin tin and bake until the shells are lightly golden. Set them aside to cool completely before adding the filling.
- While the tart shells cool, warm the milk and vanilla in a saucepan until it just begins to simmer. In a separate bowl, whisk together the egg yolks, whole egg, sugar, cornstarch, and salt. Slowly temper the eggs with the warm milk before returning everything to the saucepan. Continue whisking until the pastry cream becomes thick, smooth, and silky. Transfer it to a bowl, press plastic wrap directly onto the surface, and refrigerate until completely chilled.
- Once everything has cooled, pipe or spoon the vanilla pastry cream into each tart shell before topping with your favorite fruit pie filling. Serve immediately or refrigerate until you’re ready to enjoy these beautiful bite-sized desserts.
Storage, Freezing & Make Ahead
- These Easy Mini Fruit Pie Tarts are a wonderful make-ahead dessert.
- The baked tart shells can be stored in an airtight container at room temperature for up to 5 days, while the vanilla pastry cream can be refrigerated in an airtight container for up to 3 days. Keep the components separate until you’re ready to assemble.
- Once assembled, refrigerate the tarts in an airtight container for up to 3 days. The pastry shells will gradually soften as they sit, so they’re best enjoyed within the first 24 hours.
- To freeze, allow the tart shells to cool completely, then place them in a freezer-safe container for up to 2 months. Thaw at room temperature before filling. I don’t recommend freezing the assembled tarts, as the pastry cream and fruit topping can lose their smooth texture after thawing.

Easy Mini Fruit Pie Tarts
Equipment
- 1 Blender/food processor
- Muffin pans
- 1 Bowl
- 1 saucepan
- 1 Whisk
Video
Ingredients
Pastry Crust
- 2 3/4 cups all-purpose flour (or 1:1 gluten free flour)
- 18 tbsp cold butter (cubed)
- 1/2 tsp kosher salt
- 1/2 cup ice cold water
Vanilla Pastry Cream
- 2 cups whole milk (oat milk if daily free)
- 3 egg yolks
- 1 large vegg
- 1 cup granulated sugar
- 1 tsp vanilla paste, or 1 whole vanilla bean
- pinch of skosher alt
- 4 tbsp cornstarch
Fruit Topping
- Favorite fruit pie filling or fresh fruit
Instructions
Pastry Shells
- Preheat the oven to 400 degrees. This recipe will make 36-48 muffin tin sized tarts.
- Add all of the ingredients to a blender or food processor and pulse until combined. It should be light and airy.
- Transfer the dough to plastic wrap and wrap tightly. Place it in the freezer for 10-20 minutes until it hardens up.
- Roll the dough out until it is the thickness of pie crust.
- Use a 4" round cut to cut out your crust. Place in the muffin tins.
- Let the crusts bake for 25-30 minutes until they are golden brown.
- Let cool completely.
Pastry Cream
- Add the oat milk and vanilla to a saucepan over medium heat.
- Bring to a boil.
- Once boiling turn the heat to low.
- In a separate bowl add the egg yolks, egg, sugar, salt, and cornstarch and whisk to combine.
- While continuously whisking, add a ladleful of the warm milk. Continue to whisk as you add another ladleful.
- Pour the tempered egg mixture into the saucepan Continue to whisk until the pastry cream has thickened.
- Transfer the pastry cream to a bowl and cover with plastic wrap. Refrigerate it until it has cooled completely.
Assembly
- Pipe pastry cream into a tart shell. Top with pie filling.
- Enjoy!!
Notes
- Chill the dough before rolling for easier handling.
- Don’t overwork the pastry dough.
- Cool the tart shells completely before filling.
- Cover the pastry cream with plastic wrap touching the surface while chilling.
- Assemble shortly before serving for the crispiest crust.
- Garnish with fresh berries or mint for an extra special presentation.
Nutrition
Frequently Asked Questions
Yes! Bake the tart shells and prepare the pastry cream up to 3 days ahead. Assemble the tarts shortly before serving for the best texture.
Absolutely. Fresh strawberries, blueberries, raspberries, blackberries, kiwi, peaches, and mandarin oranges all work beautifully.
Overworking the dough or skipping the chilling step can cause pastry to shrink while baking. Be sure to chill the dough before rolling and again if it becomes too warm.
Yes. Bake and cool the tart shells completely, then freeze them in an airtight container for up to 2 months.
Wait until just before serving to fill the tart shells with pastry cream. This keeps the crust from softening too quickly.
Yes! Instead of individual tart shells, bake the dough in a tart pan and fill it with the pastry cream and fruit topping once cooled.
Strawberries, blueberries, raspberries, cherries, peaches, kiwi, blackberries, mandarin oranges, and mixed berries are all delicious choices for topping homemade mini fruit tarts.